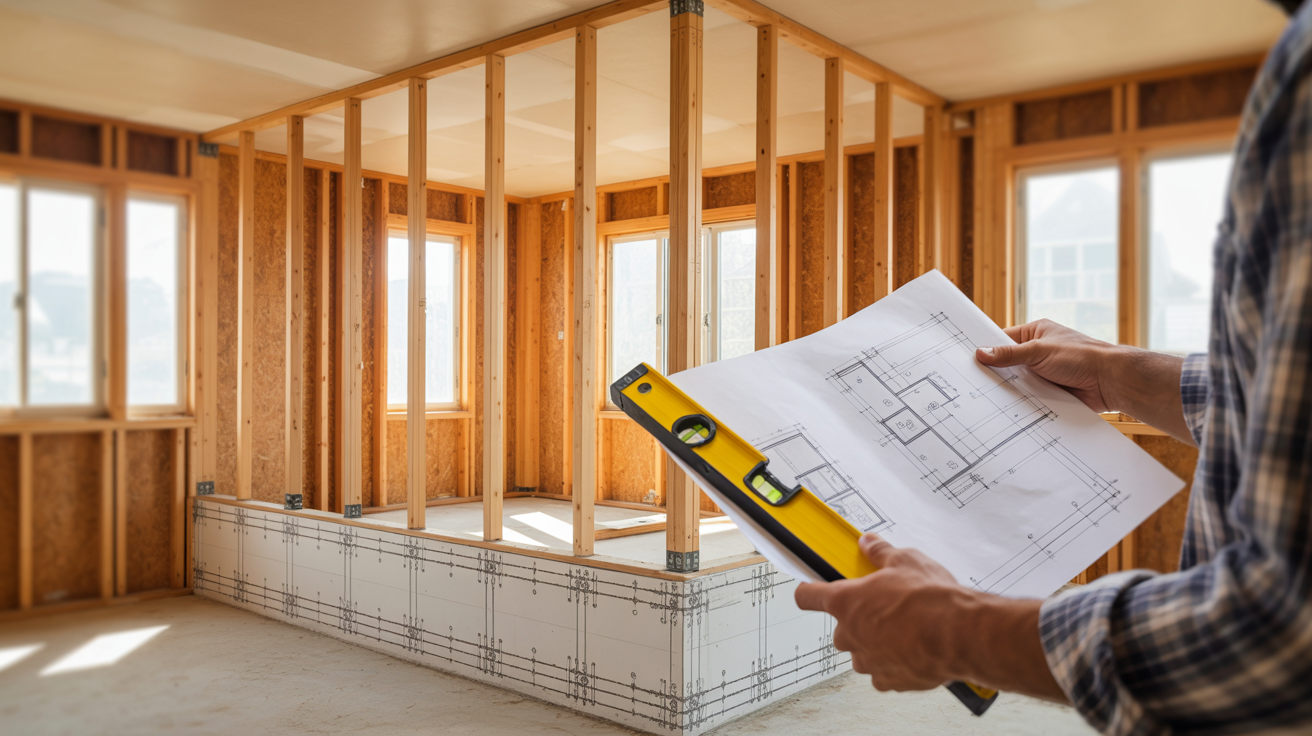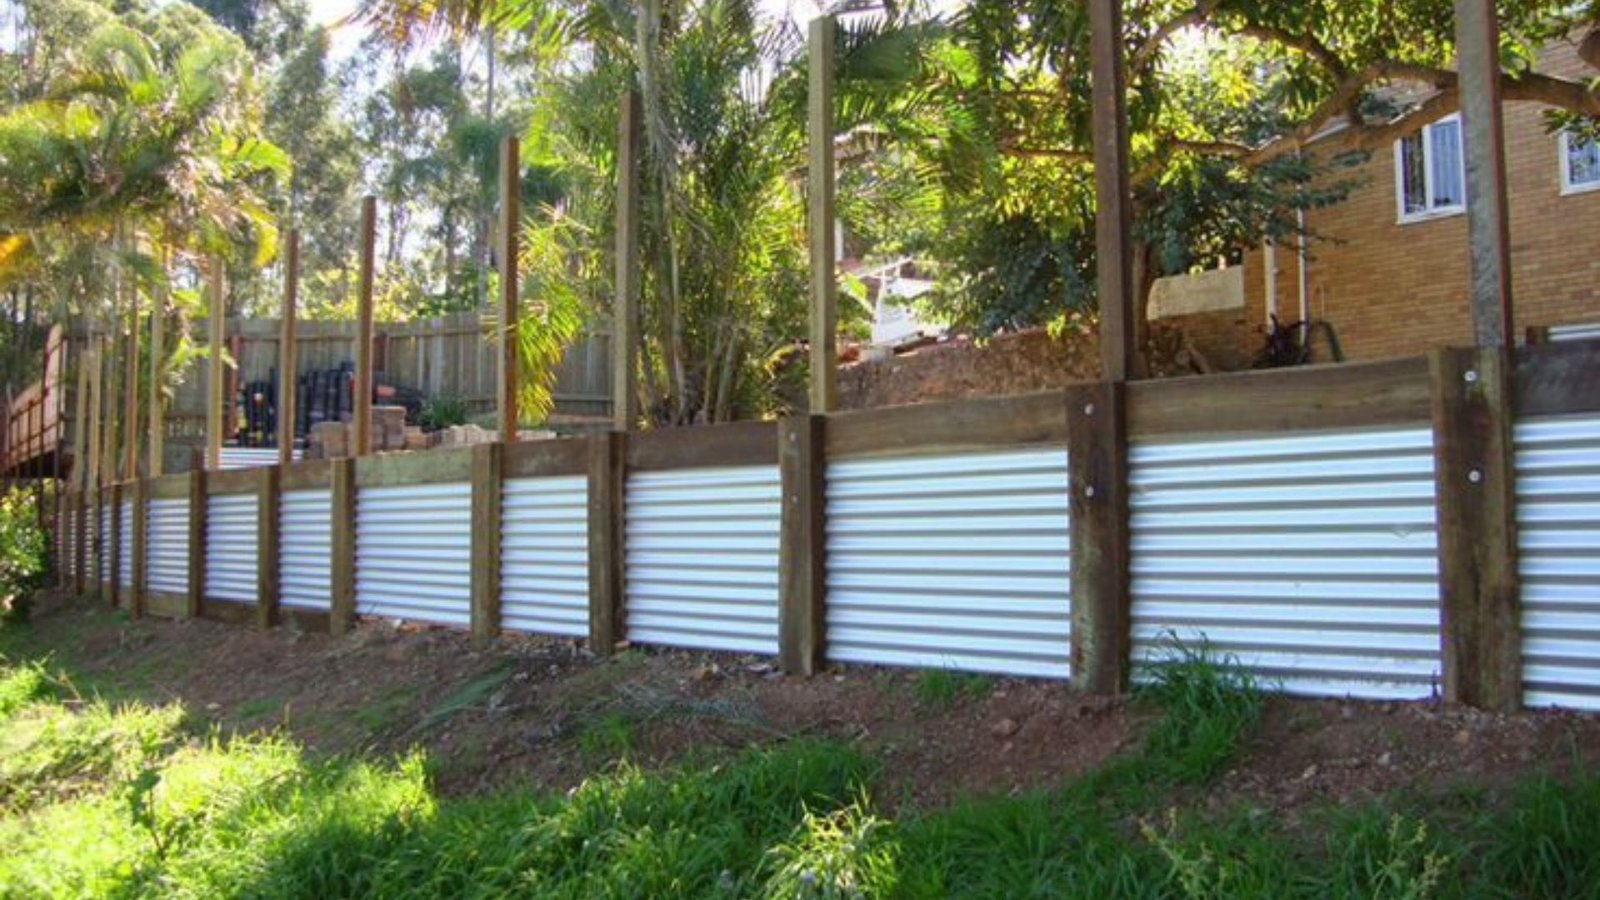
Managing soil erosion or a sloped yard can feel overwhelming, but a corrugated metal retaining wall offers a practical solution.
It stabilizes the land, controls water flow, and protects your landscaping, all while giving your property a clean, modern look.
Corrugated metal is strong, long-lasting, and requires little maintenance compared to wood or concrete. Properly installed, it can withstand soil pressure, weather, and time for decades, making it a reliable choice for any yard.
This guide will show you how to plan, build, and care for your own corrugated metal retaining wall. From choosing materials and digging footings to securing panels and setting up drainage, these steps provide a clear approach.
With the right guidance, this DIY project is achievable and will improve your yard’s stability and appearance for years to come.
What Is a Corrugated Metal Retaining Wall?
A retaining wall is a barrier that holds soil in place and prevents erosion, rockslides, and yard damage.
It provides stability on slopes and around garden beds, keeping your landscape exactly where you want it. Without it, gravity would cause soil to shift and create a mess.
Corrugated metal is a superior choice compared to wood, stone, concrete, or railroad ties. Wood rots over time, stone and concrete are heavy and costly, and ties decay despite treatment. Corrugated metal avoids these issues while providing engineered strength and durability.
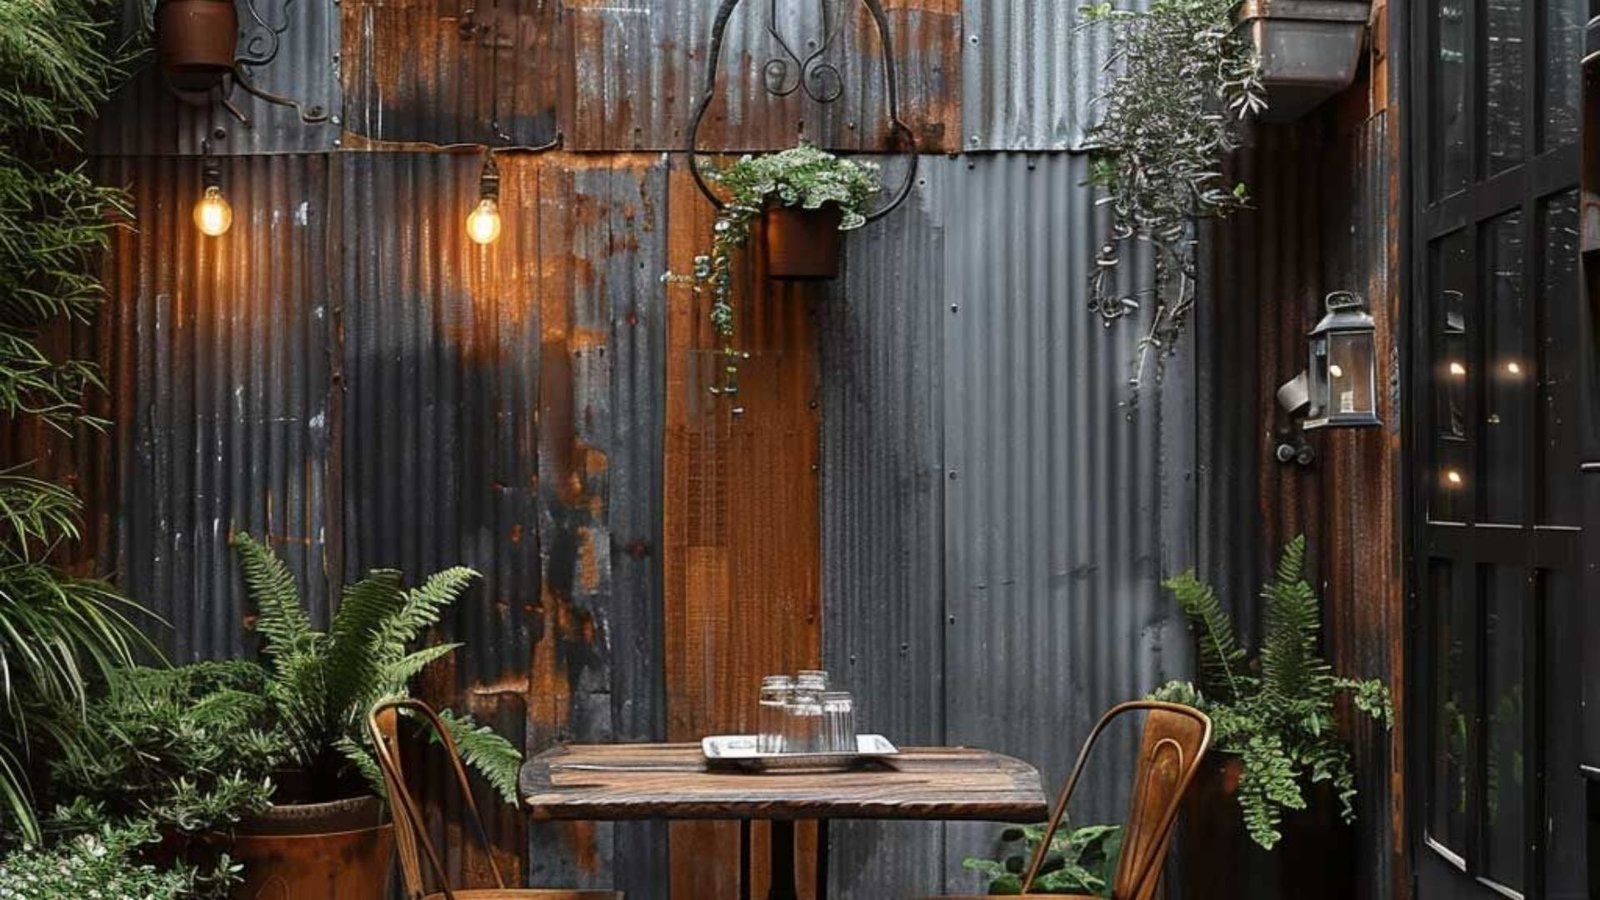
The ridges in corrugated metal give it structural strength to resist soil pressure and warping. Its rust-proof coating ensures decades of low-maintenance performance.
Installation is simple, cost-effective, and adaptable to modern, rustic, or industrial style, making it both practical and stylish.
Types of Metal Retaining Walls
Different wall types handle different situations. Knowing which type you need matters. The right design for your yard depends on space, soil, and what you’re trying to hold back.
Piling Retaining Walls
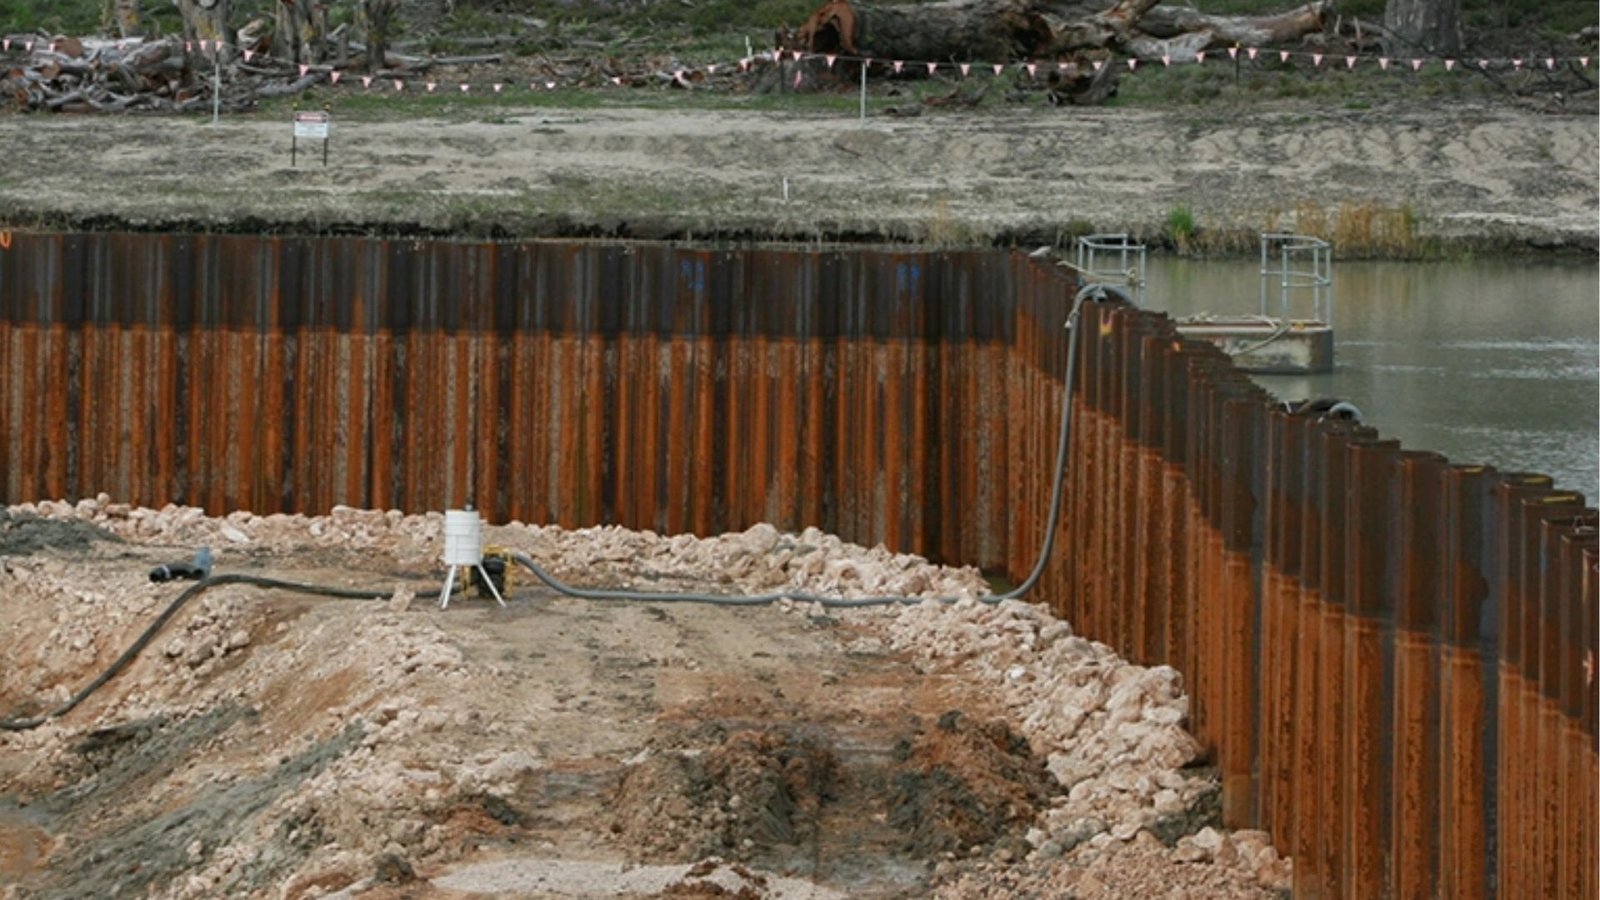
Piling walls use sheet metal driven straight into the ground. They’re thin, which is perfect when space is tight. You can drive them into various ground materials. Sand, clay, or rocky soil all work.
These walls handle both temporary and permanent jobs. Construction sites use them short term. Homeowners install them permanently for erosion control.
The driven design means they’re anchored deep, which creates serious holding power.
Gravity Retaining Walls
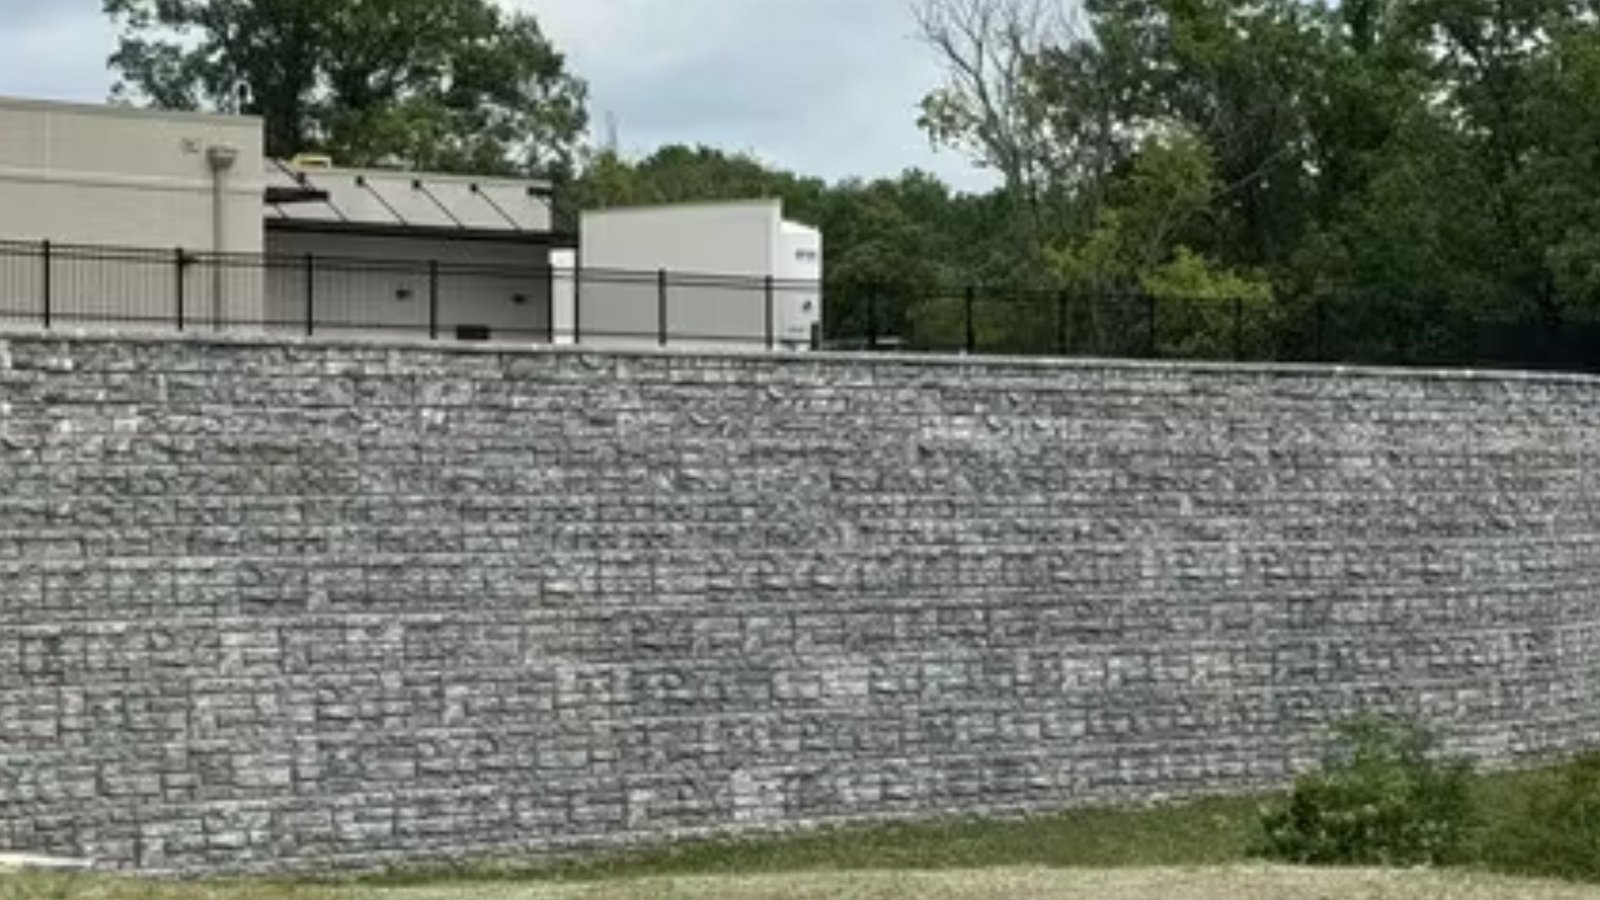
Gravity walls use sheer weight to hold soil back. Think massive stone or concrete blocks. They sit in a shallow trench, and their mass alone prevents toppling or sliding.
You won’t typically build these with corrugated metal. The metal isn’t heavy enough to work as a gravity wall. Stone, brick, and concrete dominate this category because they’ve got the weight needed for the job.
Cantilever Retaining Walls
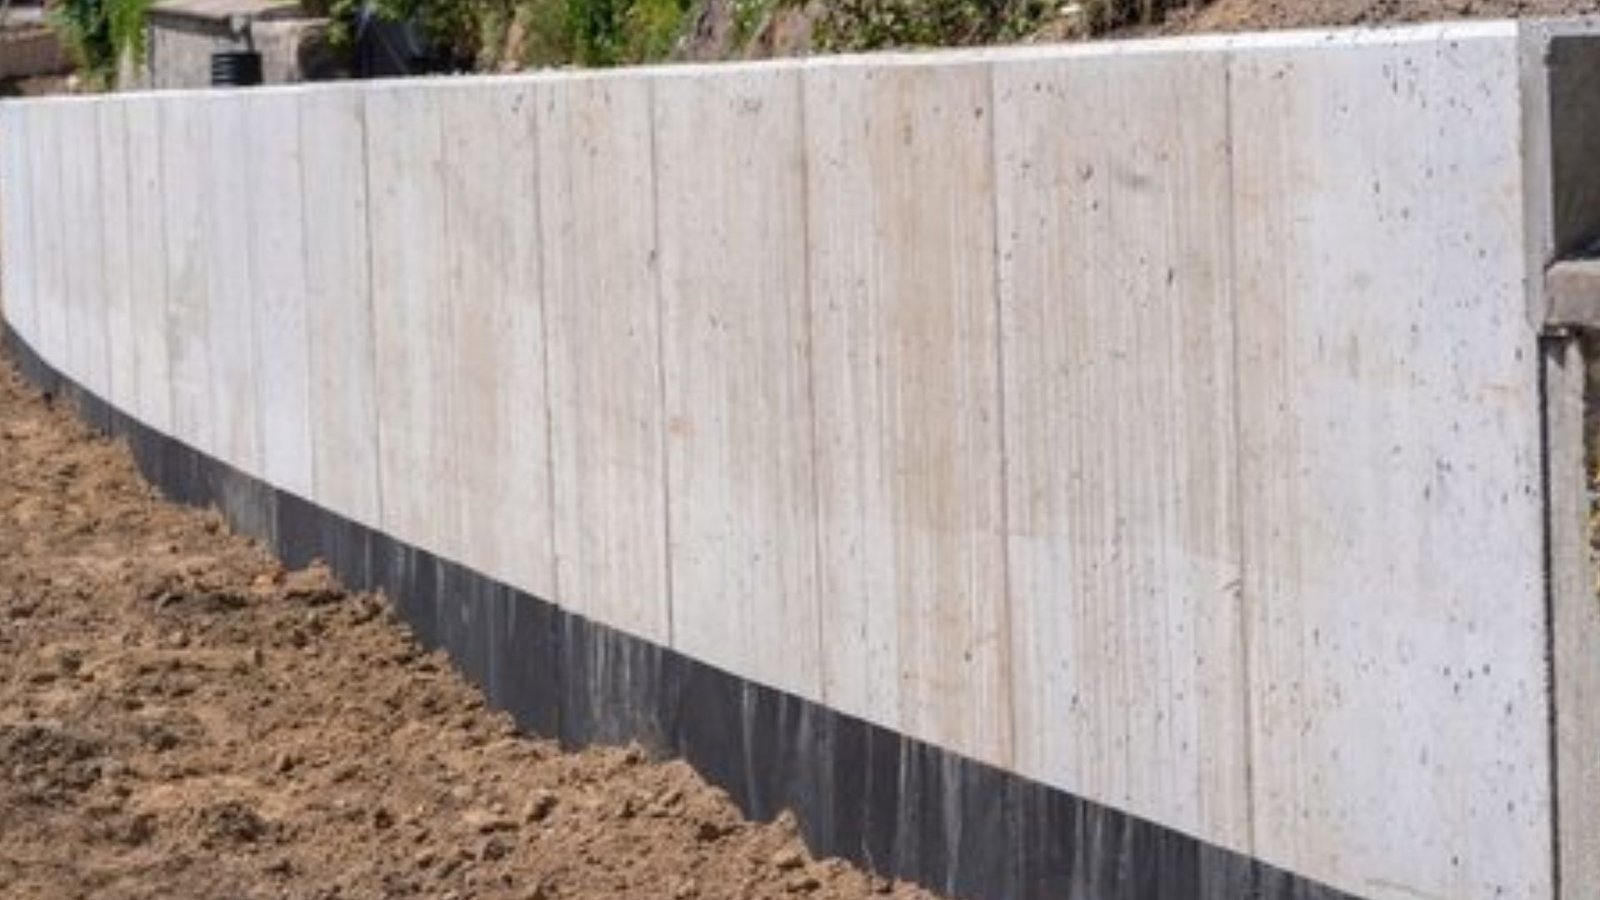
These walls look like an L or upside-down T. The soil itself holds down part of the wall. The weight of the earth on the heel prevents the visible wall from toppling forward.
Concrete is the usual material here. Additional supports called buttresses add extra strength if needed. This design works great for taller walls where simple weight or posts aren’t enough.
Anchored Retaining Walls
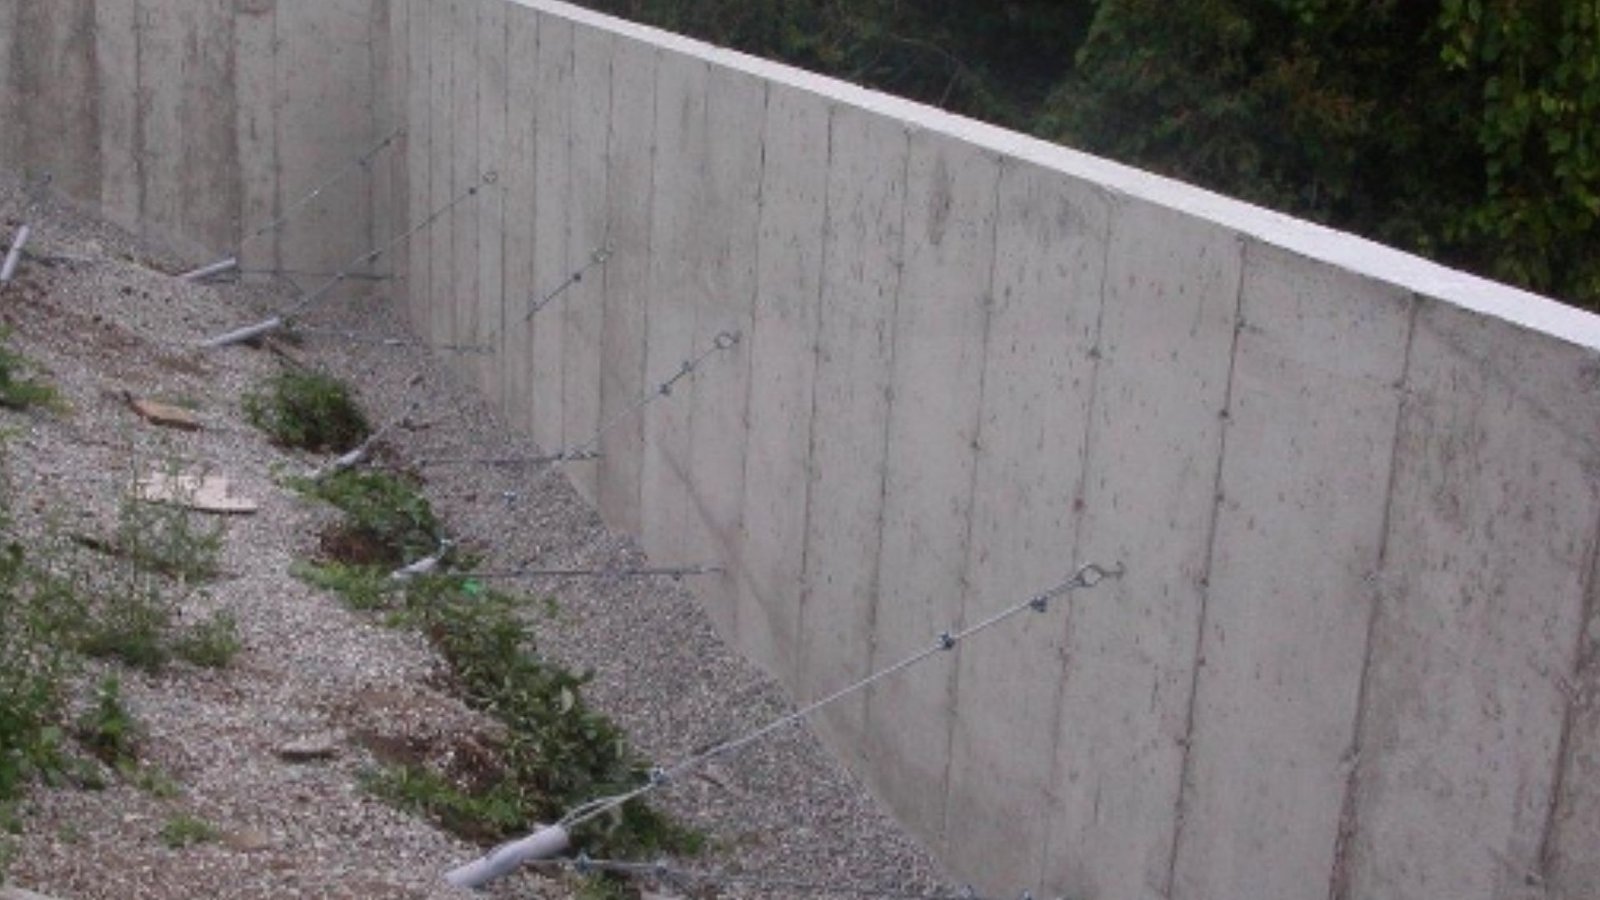
Anchored walls use cables and anchors driven deep behind the wall. The anchors expand underground, and cables connect them to the wall face. This creates a pulling force that keeps everything stable.
The system prevents slipping even with heavy soil pressure. It’s overkill for most residential projects, but crucial for commercial applications or areas with unstable soil conditions.
Materials You’ll Need for Construction
Quality materials make the difference between a wall that lasts decades and one that fails in years. Don’t cheap out on the foundation of your project.
- Corrugated Metal Sheets: Choose durable 24 to 26 gauge sheets with galvanized or painted finishes for rust resistance and proper outdoor use.
- Support Posts: Use steel or treated wood posts sized 4×4 or equivalent, spaced 4 to 6 feet apart, and extend below the frost line for stability.
- Concrete and Footings: Pour concrete around each post and let it cure for 24 to 48 hours to ensure posts stay firm against soil pressure.
- Basic Tools and Fasteners: Use drills with metal bits, levels, post hole diggers, and metal screws or rivets. Always wear gloves, safety glasses, and ear protection.
- Drainage Materials: Install 4-inch perforated pipes with gravel and landscape fabric behind the wall to prevent water pressure from damaging the structure.
Step-by-Step Guide to Building Your Corrugated Metal Retaining Wall
Let’s build this thing. Follow these steps in order. Skipping ahead or rushing through stages creates problems you’ll have to fix later.
Step 1: Mark and Prepare the Area
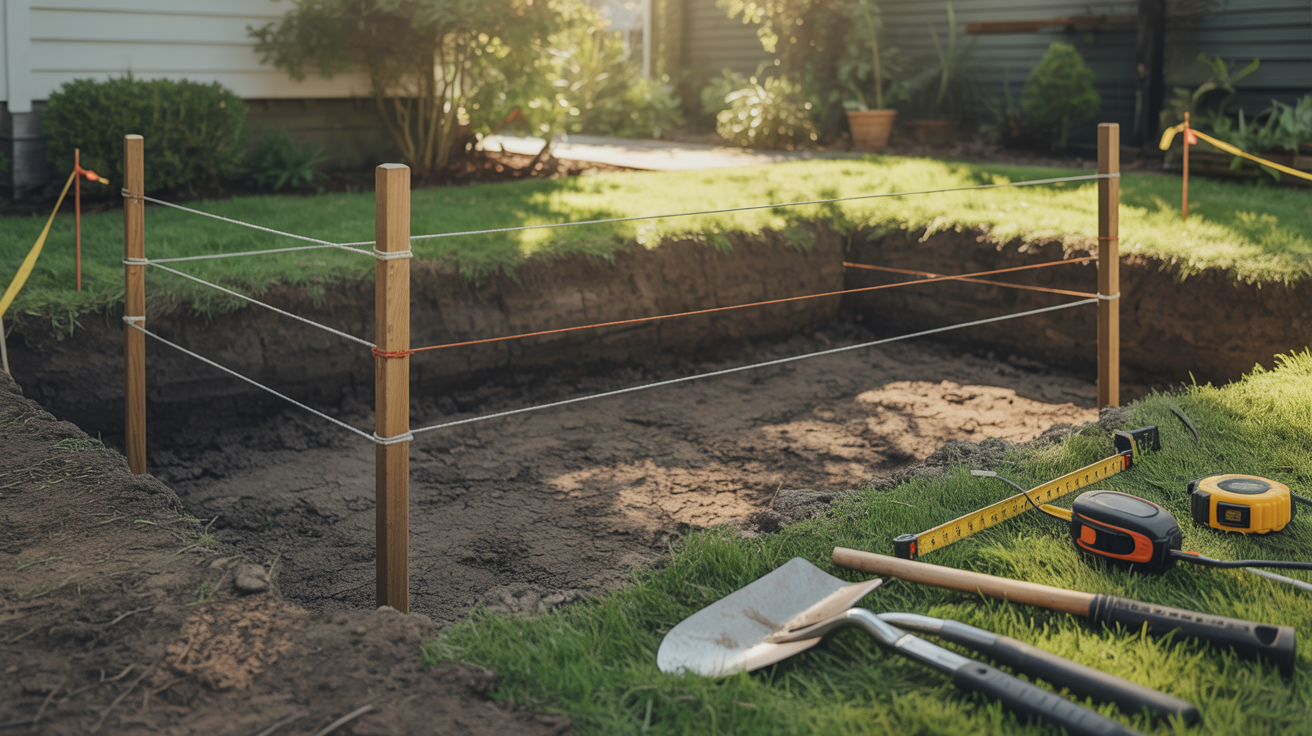
Drive stakes at each end of your planned wall. Run a string between stakes to mark the exact wall location. This is your reference line for everything that follows.
Clear all vegetation, rocks, and debris from the work area. Call 811 before digging to mark underground utilities, including gas, electric, water, and cable. Hitting a utility line is dangerous and expensive. Create a level reference line using a line level on your string.
Step 2: Dig Footings for Support Posts
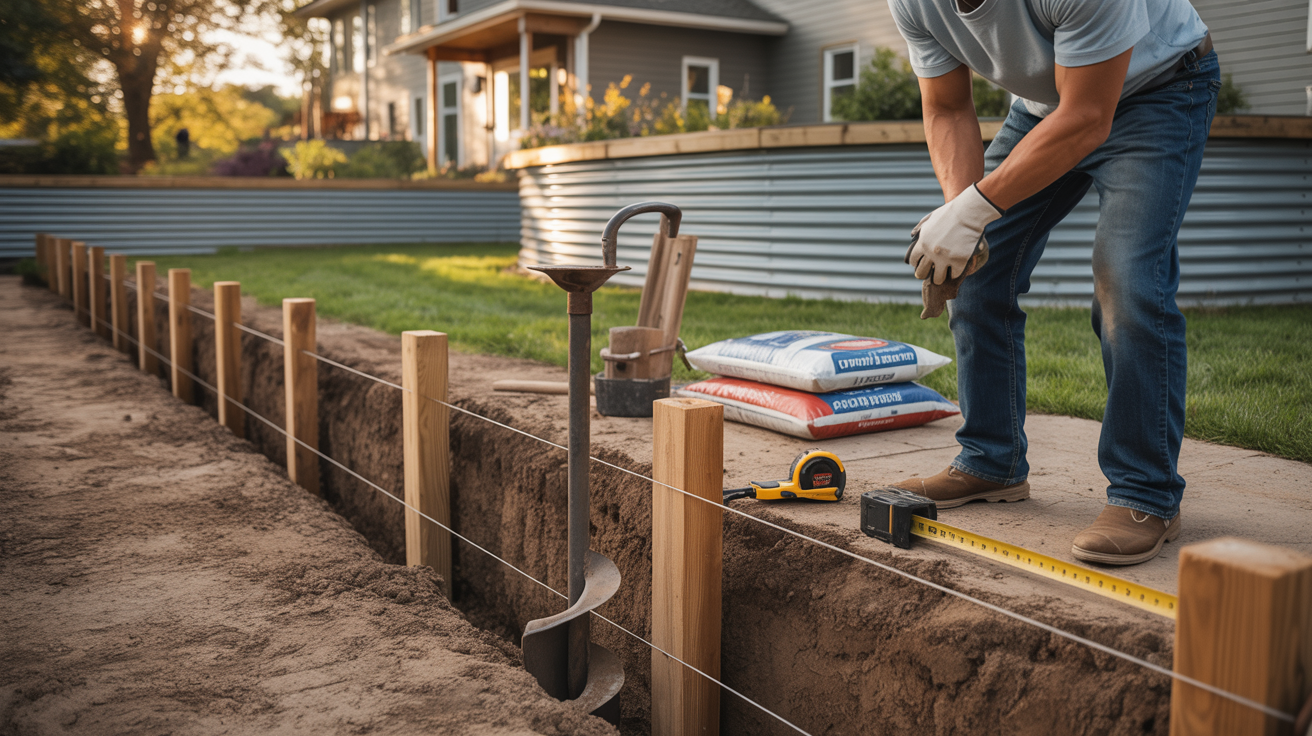
Dig post holes below the frost line for your area. Cold climates need deeper holes. Typically 18 to 36 inches, depending on local frost depth. Check local building codes for exact requirements.
Space holes evenly along your marked wall line. Make them 12 inches in diameter to allow room for concrete around the post.
Use a post hole digger for small projects or rent a power auger for larger walls. Keep holes level and properly aligned with your string line.
Step 3: Install and Secure Support Posts
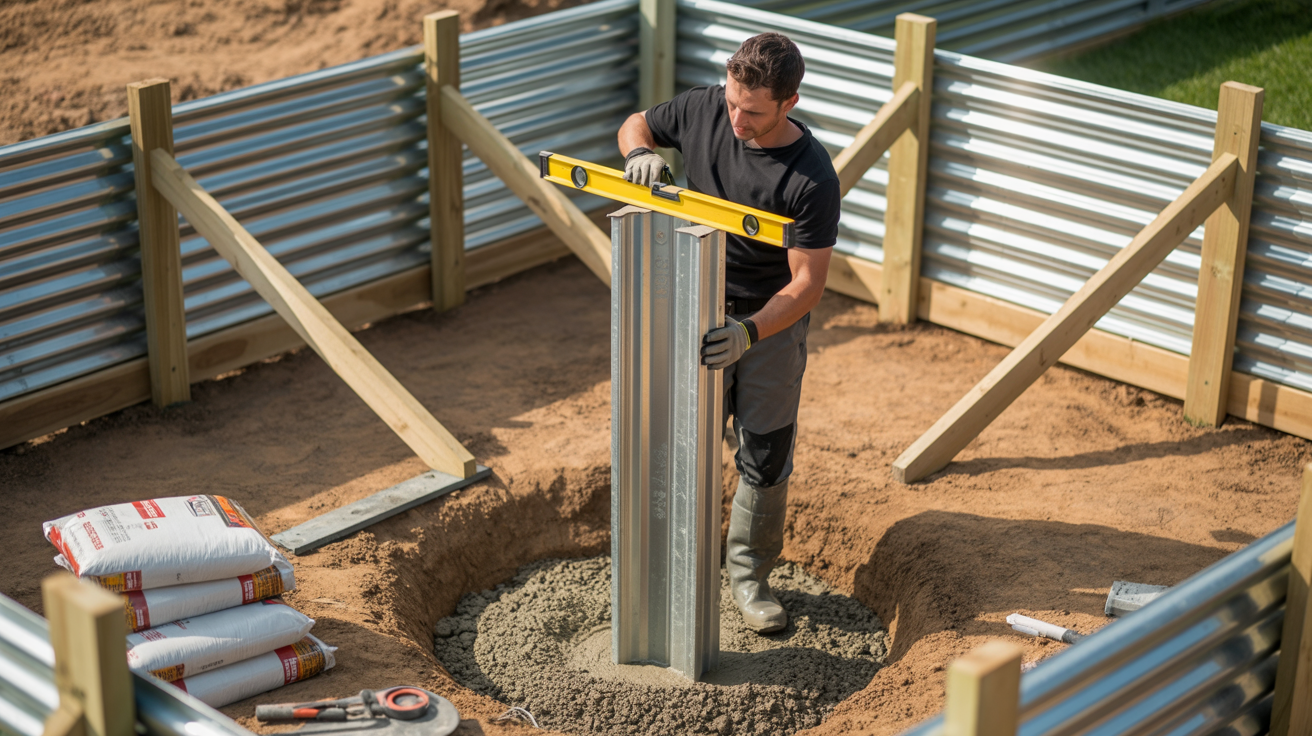
Drop each post into its hole and check that it’s perfectly vertical. Use a level on two adjacent sides. Temporary diagonal braces hold posts in position while you pour concrete.
Mix concrete according to package directions. Pour around each post, filling the hole. Tap out air pockets with a stick or rod.
Double-check post alignment before concrete starts setting. You have about 20 to 30 minutes to make adjustments. Let the concrete cure for 24 to 48 hours.
Step 4: Attach Corrugated Metal Sheets

Start at one end and work systematically toward the other. Overlap sheets by one or two ridges for water resistance at seams. This overlap also adds strength to the wall.
Secure sheets to posts with metal screws or rivets rated for outdoor use. Space fasteners 12 to 18 inches apart along each post. Maintain consistent height along the top of the wall. Your reference string helps here.
Keep sheets plumb using a level frequently. Don’t overtighten fasteners, or you’ll dimple the metal.
Step 5: Install Drainage System
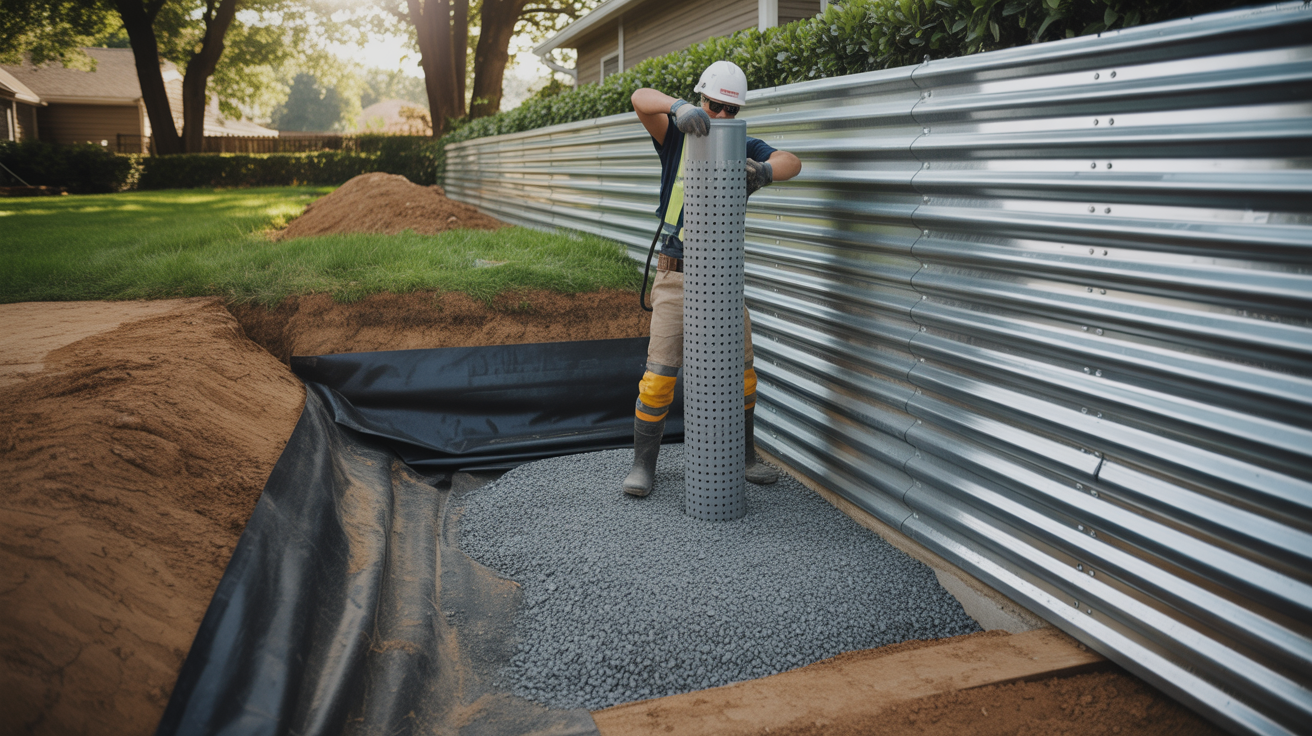
Dig a trench directly behind the wall base. This trench holds your drainage pipe. It should slope slightly toward the outlet end to encourage water flow.
Lay landscape fabric along the back of the wall and into the trench. Place a perforated drainage pipe at the base with holes facing down.
Backfill the trench with gravel for 6 to 12 inches. The fabric wraps over the gravel to keep soil from clogging the system. Make sure the pipe outlets away from the wall, not back toward it.
Maintenance Tips for Long Lasting Performance
Maintenance is simple but not optional. A little attention prevents big problems. Your wall will last for decades if you check it regularly.
- Inspect your wall at least twice a year in spring and fall, checking for leaning, loose fasteners, and proper drainage.
- Document changes with photos to catch small issues early before they become major repairs.
- Treat rust by sanding surface spots, cleaning thoroughly, and applying rust-inhibiting paint or coating.
- Maintain drainage by clearing outlets annually, flushing pipes, and ensuring no standing water behind the wall.
- Check structural integrity by monitoring posts, fasteners, and metal sheets for movement, warping, or bending, and adjust seasonally for freeze-thaw and heat effects.
Common Problems and Solutions
Even good walls develop issues sometimes. Here’s how to fix common problems before they become serious failures.
- Walls lean or bow when drainage fails or posts are insufficient, creating pressure from soil and water.
- Minor lean can be stabilized with improved drainage, but serious lean may require additional posts or professional help.
- Surface rust is cosmetic, while structural rust weakens metal. Fix scratches and replace damaged sections promptly.
- Drainage failures cause water buildup and erosion. Install pipes, create outlets, or regrade soil to relieve pressure.
- Posts become unstable if footings are shallow or if concrete fails. Permanent repair requires resetting posts below the frost line with proper concrete.
Comparing Corrugated Metal to Alternative Materials
Let’s look at why corrugated metal makes sense compared to everything else. Real comparisons, not marketing hype.
|
Material |
Installation Ease |
Lifespan / Durability |
Maintenance Needs |
Cost & Effort |
Notes |
|
Wood |
Easy, DIY-friendly |
10–15 years |
Replace rotted boards, pest control |
Moderate upfront, high long-term |
Rot and termites reduce lifespan |
|
Concrete Blocks / Pavers |
Labor-intensive, masonry skills required |
Moderate, individual blocks shift |
Re-leveling and resetting blocks regularly |
Higher than metal, skilled labor |
Hard surfaces can be safety hazards |
|
Railroad Ties |
Very difficult, heavy |
Moderate, depends on moisture |
Eventually decay, heavy to install |
High per tie, labor-intensive |
Pressure-treated ties still decay in moist soil |
|
Natural Stone |
Complex, requires expertise |
Very long if built correctly |
Minimal if installed properly |
2–3 times higher than metal, professional installation |
Best for decorative or high-visibility areas. overkill for purely functional walls |
Additional Tips for Success
These extra insights help you avoid common pitfalls. Small details that make big differences.
- Adapt your design to local climate, ensuring posts are below the frost line in cold areas and using UV-resistant coatings in hot regions.
- Consider soil type for drainage needs, using power augers for rocky soil and proper systems for clay-heavy areas.
- Choose the right metal coating, such as galvanized for durability, painted for color, or bare steel for patina in dry climates.
- Follow proper installation steps carefully, ensuring deep posts and adequate drainage, and perform regular maintenance twice a year.
- Improve visual appeal with paint, powder coating, plants, mixed materials, and lighting to soften and highlight the wall.
Conclusion
Building a corrugated metal retaining wall is more doable than it might seem. With proper planning, choosing the right materials, and following straightforward steps, you can create a wall that manages erosion and adds structure to your yard.
Measuring carefully, installing support posts, and ensuring proper drainage are key to success.
Corrugated metal is durable and low-maintenance. Checking for rust and keeping drainage clear will help your wall last for years. It works well for sloped yards, garden terraces, or marking property lines while providing strength that other materials may not match.
Now that you have the guidance, it’s time to start. Gather your materials, follow the steps, and build a wall that performs reliably. Share your questions or experiences in the comments and connect with others tackling similar projects.
Frequently Asked Questions
How long does a corrugated metal retaining wall last?
A properly installed corrugated metal retaining wall with rust-resistant coating can last 25+ years with minimal maintenance. The key is using quality materials, installing proper drainage, and checking for rust occasionally. This far outlasts wood (10-15 years) and requires less upkeep than concrete or stone walls.
Can I build a corrugated metal retaining wall myself?
Yes, for walls up to 3-4 feet tall. You’ll need corrugated metal sheets, support posts, concrete, and basic tools like a drill and level. Mark your area, dig footings, install posts, attach metal sheets, and add drainage. Taller walls or steep slopes should involve professionals.
How much does a corrugated metal retaining wall cost?
Material costs vary by project size but are generally cost-effective. You’ll need corrugated metal sheets, steel or wood posts, concrete, fasteners, and drainage materials. DIY installation saves significant money versus hiring contractors. Long-term, corrugated metal costs less than materials requiring frequent replacement or maintenance.
Does corrugated metal rust on retaining walls?
Quality corrugated metal with rust-proof coating resists corrosion for decades. Check the lower sections near the soil twice yearly for any surface rust. If found, sand it away and apply rust-inhibiting paint. Proper drainage behind the wall prevents moisture buildup that causes rust.
What’s better for retaining walls: wood or corrugated metal?
Corrugated metal outlasts wood significantly. Wood rots, attracts termites, and typically lasts 10-15 years even when treated. Corrugated metal lasts 25+ years, resists decay, requires less maintenance, and handles soil pressure better without warping. Metal is more cost-effective long-term despite similar upfront costs.